Thank you so much for having chosen iSOON!
Several weeks have been necessary to build this template for having a perfect layout on every screen, an advanced design and the last trends coupled with an accurate coding.
I would be very grateful if you could rate my item at this link with 5 stars and leave your feedback, this is very important for me, Thanks! :-)
If you have any questions, feel free to email me via my user page with the contact form Here
I try to answer as soon as possible, 7/7 and almost 24/24!
Time in my country :
During your customization, I advise you to be connected to Internet for the correct running of jQuery
All the lines of style written in this document are the lines of the CSS files. The line numbers for the SASS users are almost the same, thanks for your comprehension.
Did you know?
The licence you purchased allows you to use iSOON on one domain.
A single licence is needed for each time you use iSOON on an other website.
Thanks a lot for taking this point in consideration, allowing me to keep supporting and releasing new updates.
How To Install iSOON Via FTP :
Step 1 - Log into your hosting space via an FTP software (Filezilla for example).
Step 2 - Unzip your Download Pack file and open the extracted iSOON template folder.
Step 3 - Upload the HTML file corresponding to the variant of your choice along with all directories (css,js,php,img) like the structure that they appear in your iSOON template folder. Then, the HTML file should reside in the root directory, and all other files should reside inside their associated folder.
Used as solid base of this template, the Fullpage plugin created by Alvaro Trigo is coming from here.
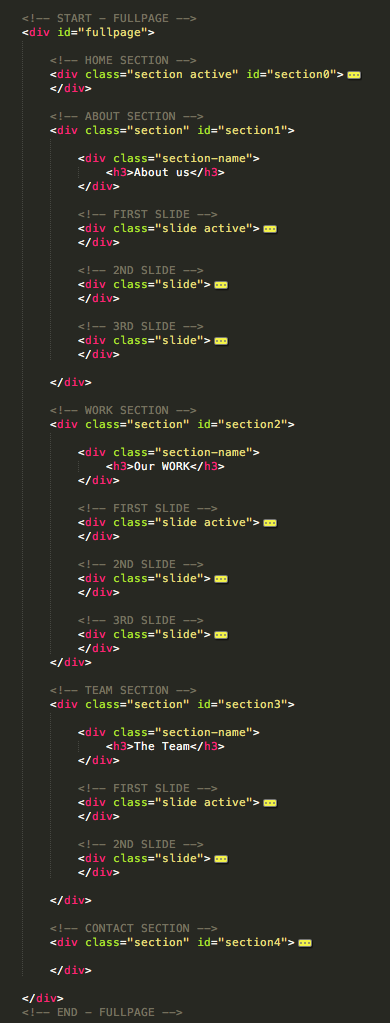
How looks the structure?
We will see the example of the original variant with classic section and horizontal sliding section.
The first section must have the active class, the first slide of each section must have too.
Here is a screenshot showing you how the core of your page must be.
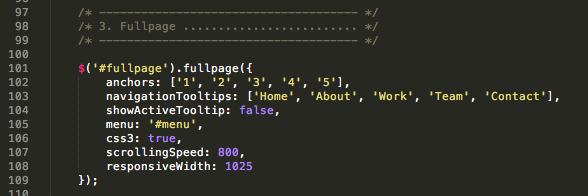
The plugin is fired in the main(-xxx).js file corresponding to the variant you've chosen.
You will find the following code used to start the plugin, display the menu and the anchors.
The countdown plugin is fired in the main(-xxx).js file corresponding to the variant you've chosen.
You will find the following code used to start the plugin and to set your end date.

1st solution : Mailchimp
Newsletter service
More than 12 million people and businesses around the world use MailChimp to create, send, and track email newsletters. Whether you're self-employed, you manage projects for clients, or you work for a Fortune 500 company, MailChimp has features and integrations that will suit your email marketing needs. More informations
For the configuration with Mailchimp, you must just to know your API Key and the ID of your list.
Be sure that the form created in your mailchimp dashboard is asking only the email address and not the name, surname or something else.
Find or Generate Your API Key
Users with Manager permissions can generate and view their own API keys. Users with Admin permissions can also see API keys for other account users.
Below, you'll learn how to grab an existing API key or generate a new one.
• Step 1 - Click your profile name to expand the Account Panel, and choose Account.
• Step 2 - Click the Extras drop-down menu and choose API keys.
• Step 3 - Copy an existing API key or click the Create A Key button.
• Step 4 - Name your key descriptively, so you know what application uses that key.
Find Your List ID
Each MailChimp list has a unique List ID that integrations, plugins, and widgets may require to connect and transfer subscriber data.
The List ID is generated by Mailchimp when the list is created and cannot be changed.
There are two ways to find the List ID for a MailChimp list.
From the Settings page
• Step 1 - Navigate to the Lists page.
• Step 2 - Click the drop-down menu next to the list you want to work with, and choose Settings.
• Step 3 - Scroll to find the unique List ID field. The string of letters and numbers is the list ID.
From the List Name and Defaults Page
• Step 1 - Navigate to the Lists page.
• Step 2 - Click the drop-down menu next to the list you want to work with, and choose Settings.
• Step 3 - Click List name & defaults.
• Step 4 - Find the List Name heading and look nearby for the List ID.
• Step 5 - Find List ID under List name heading
Final step
Open the file "notify-me.php" findable in the folder php/notify-me.php and fill up the API_KEY and LIST_ID fields.
// Set to "mailchimp" or "file"
$STORE_MODE = "mailchimp";

// MailChimp API Key findable in your Mailchimp's dashboard
$API_KEY =  "XXXXXXXXXXXXXXXXXXXXXXXXXXXXXXXX-XX0";

// MailChimp List ID  findable in your Mailchimp's dashboard
$LIST_ID =  "XXXXXXXXXX";
2nd solution : File
Save the emails in a .txt file
Second solution, the save of the subscribers's emails in a txt file at the root of your server
Set up the file storage :
• Step 1 - Create a .txt file empty or use the file subscription-list.txt provided in your download pack.
• Step 2 - Upload the file at the root of your server
• Step 3 - Open the file "notify-me.php" findable in php/notify-me.php
• Step 4 - You have to fill up the fields and comment the Mailchimp settings as on the code below:
// Set to "mailchimp" or "file"
$STORE_MODE = "file";

// MailChimp API Key findable in your Mailchimp's dashboard
// $API_KEY =  "XXXXXXXXXXXXXXXXXXXXXXXXXXXXXXXX-XX0";

// MailChimp List ID  findable in your Mailchimp's dashboard
// $LIST_ID =  "XXXXXXXXXX";

// After $_SERVER["DOCUMENT_ROOT"]." , write the path to your .txt to save the emails of the subscribers
$STORE_FILE = $_SERVER["DOCUMENT_ROOT"]."/subscription-list.txt";
3rd solution : Email
Receive in your inbox
Third solution, you can receive directly in your inbox, the subscribers's emails
Set up the email sending :
• Step 1 - Open notify-me-2.php findable in php/notify-me-2.php
• Step 2 - Rewrite your email and don't forget to change the path in your html, see the code examples below
$email_to = 'myemail@email.com'; // Replace by your email address
<form action="php/notify-me-2.php" id="notifyMe" method="POST">
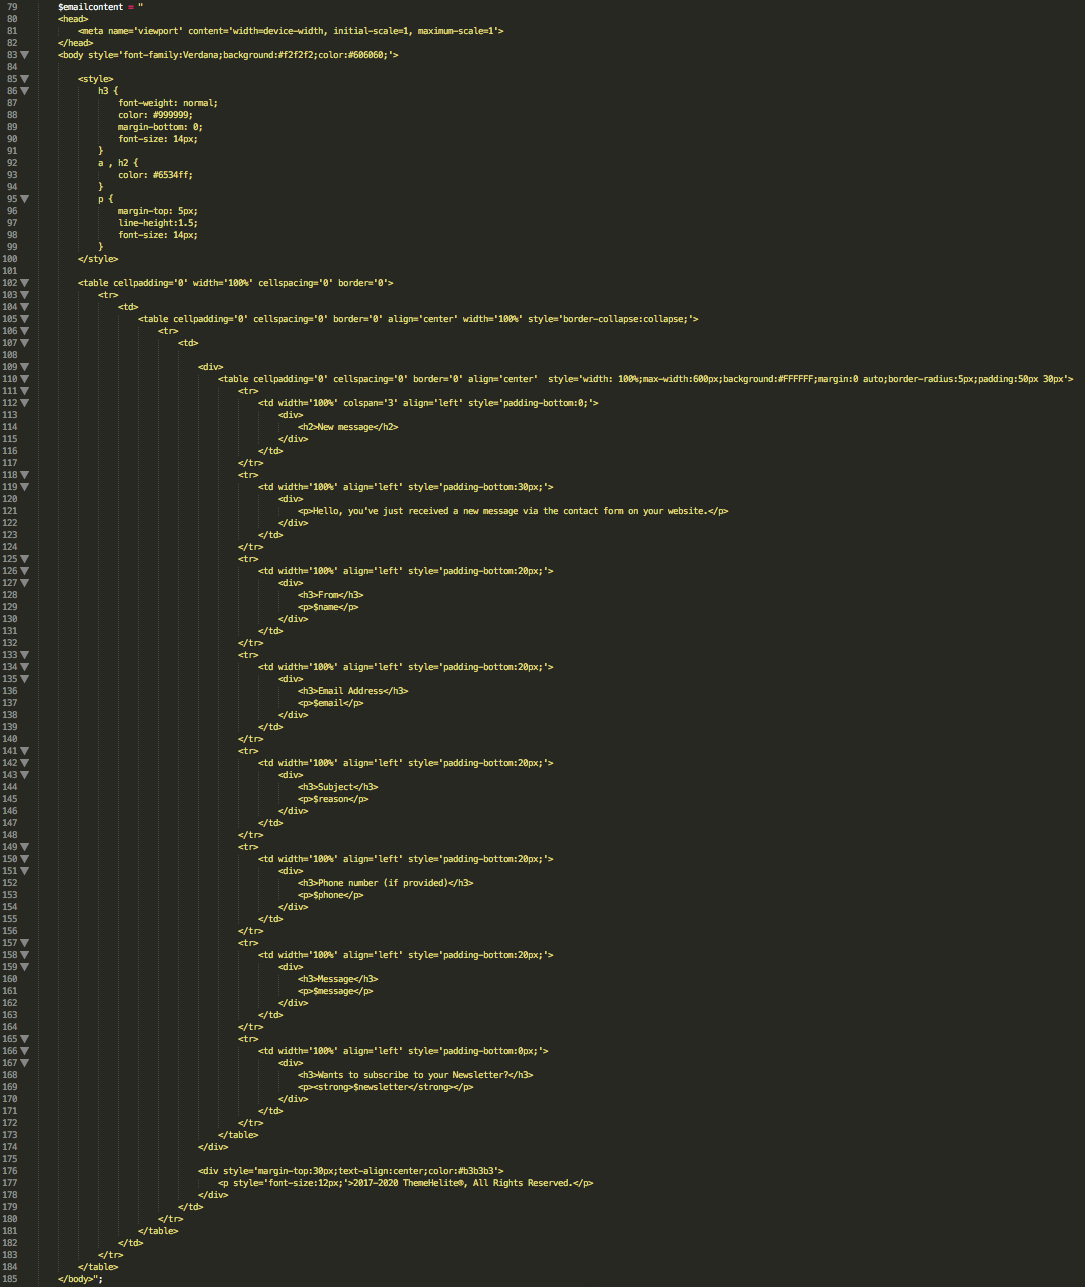
Then you can edit the content about the email you will receive in your inbox in notify-me-2.php, see the code below.
I built up an elegant email body, this is why you will find some html and css in the next part of code.
$text = "
<head>
<meta name='viewport' content='width=device-width, initial-scale=1, maximum-scale=1'>
</head>
<body style='font-family:Verdana;background:#f2f2f2;color:#606060;'>
<style>
h2 {
color: #6534ff;
}
a {
color: #FFFFFF;
text-decoration: none;
}
p {
line-height:1.5;
font-size: 14px;
}
</style>
<table cellpadding='0' width='100%' cellspacing='0' border='0'>
<tr>
<td>
<table cellpadding='0' cellspacing='0' border='0' align='center' width='100%' style='border-collapse:collapse;'>
<tr>
<td>
<div>
<table cellpadding='0' cellspacing='0' border='0' align='center' style='width: 100%;max-width:600px;background:#FFFFFF;margin:0 auto;border-radius:5px;padding:50px 30px'>
<tr>
<td width='100%' colspan='3' align='center' style='padding-bottom:10px;'>
<div>
<h2 >Woohoo! 1 new subscriber</h2>
</div>
</td>
</tr>
<tr>
<td width='100'> </td>
<td width='400' align='center' style='padding-bottom:5px;'>
<div>
<p >One of your visitors has just subscribed to your Newsletter, here is their email address :</p>
</div>
</td>
<td width='100'> </td>
</tr>
<tr>
<td width='100'> </td>
<td align='center' style='padding-top:25px;'>
<table cellpadding='0' cellspacing='0' border='0' align='center' width='200' height='50'>
<tr>
<td bgcolor='#6534ff' align='center' style='border-radius:4px;padding:0 25px;color:#FFFFFF' height='50' width='auto'>
<div>
$email
</div>
</td>
</tr>
</table>
</td>
<td width='100'> </td>
</tr>
</table>
</div>
<div style='margin-top:30px;text-align:center;color:#b3b3b3'>
<p style='font-size:12px;'>2017-2020 ThemeHelite®, All Rights Reserved.</p>
</div>
</td>
</tr>
</table>
</td>
</tr>
</table>
</body>";
1st step
Set your email and the subject in the contact-me.php file.

2nd step
Edit several properties and text alerts for the contact form in the same file, contact-me.php, see the code below.
Alert messages
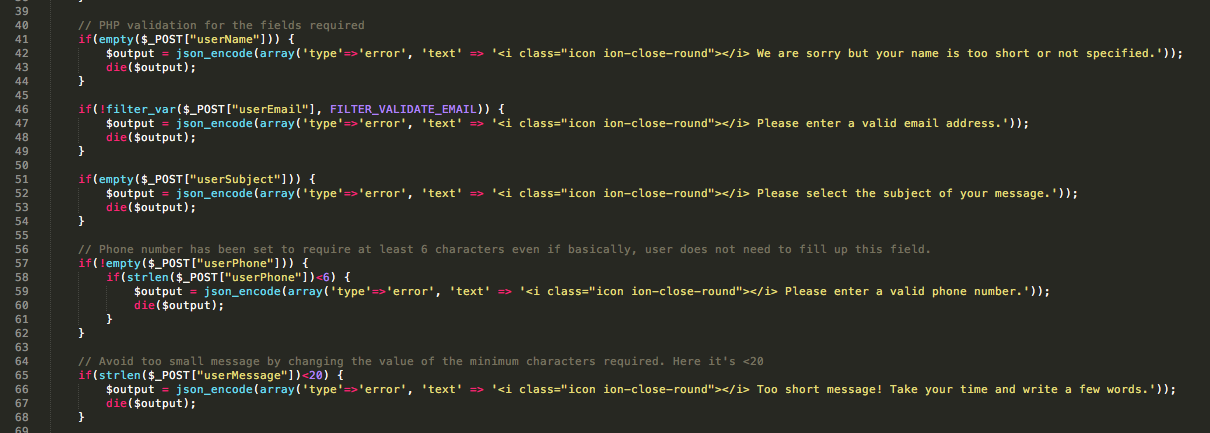
Validation messages

Email's body you will receive in your inbox I built up an elegant email body, this is why you will find some html and css in the next part of code.
The 'From' address
As an example, the 'From' address should be set to something like 'noreply@yourdomain.com' in order to be based on the same domain as the form.
If you try to use a 'From' that’s not based on the domain on which your form resides, like :
$headers .= 'From: My website' . "\r\n"; the anti-spam could block the sending, but you can give a try.
If you do not know what to write in the 'From' field for your contact form, you may wish to contact your hosting provider for assistance.

PS : If you're getting some troubles to receive the form submissions, here are some possibilities that could block the sending :
• Check your spam folder
• Is PHP Mail() function active on your server?
• Try to change your email with a Gmail address
• Upgrade the PHP version running on your server to 5.5 (can be done in your hosting provider's panel or by their)
How to know if PHP Mail function is active on my server?
It’s quite possible PHP mail() function is either disabled or not configured properly on your server. An easy way to check if e-mail sending is working is using this code. It’s as simple as it gets, if this code doesn’t work no other will:
<?php
mail('you@yourmail.com','Test mail','The mail function is working!');
echo 'Mail sent!';
?>
• Save this code as mailtest.php
• change you@yourmail.com to your e-mail address
• upload mailtest.php to your server
• open mailtest.php in your browser (http://yourwebsite.com/mailtest.php)
• check your inbox to see if a test message arrived.
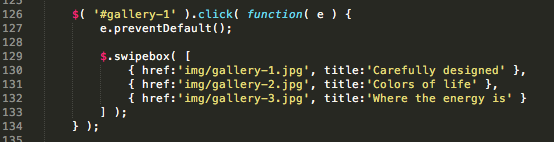
The photo galleries are generated with Swipebox, a jQuery "lightbox" plugin for desktop, mobile and tablet. More informations about this excellent plugin can be found here.
HTML markup
The most important part is to set correctly the link opening the pictures, add correctly the id corresponding to your gallery.

JS
Additionally to the link for opening the pictures in the gallery, you have to create your gallery in the main(-xxx).js file corresponding to the variant you've chosen.
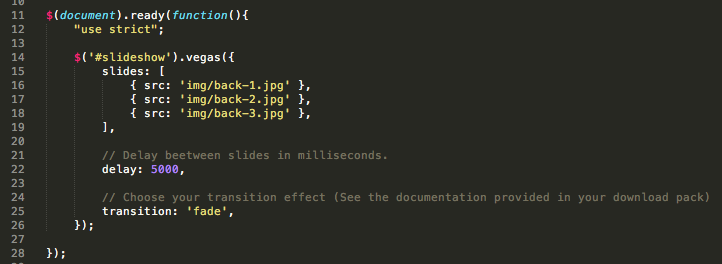
VEGAS is a jQuery plugin which adds beautiful animated background slideshows to your page body or any of its elements. It works on IE9+, Safari, Firefox and Chrome.
Check the awesome official documentation of this plugin here for all the settings available.
Specific slide options and settings are in the file js/vegas.js, see the code below.
Documentation
Just below the nav on your left, you will find 4 useful links to learn or improve your knowledges in SASS, Bootstrap, Bourbon & IonIcons